|||BE HOME SOON|||

Pages

Friday, August 29, 2014

LA bound


We are headed out to LA this weekend!  Evan has rehearsals for a while there and then heads to South America for 2 months.  So in true fashion (which is fly by the seat of our pants) we decided last weekend that I was to come along.  If you follow me on instagram then expect some palm tree pics coming your way!

Here is what I am loving as of late-

The idea of a minimalist closet from this adorable girl. I ripped out half of my closet this week in a mad frenzy to simplify my life.  Who's with me?!

These Rifle Paper Co books illustrated by Anna Bond.  So beautiful!

I am obsessed with these pendant lights!  How amazing would they be in a restaurant? 

If you are looking for throw pillows, Stay and Co is having a warehouse sale. I can't wait for their new line! 

I hope everyone has a great weekend! If you have any suggestions for food/shopping/fun in LA I would love to hear them!


Wednesday, August 27, 2014

How to Clean an Antler for a More Modern Look


Antlers are such a fun and easy accessory to throw on top of some books or a nightstand.  They make it look a little more styled without being cluttered.  And although "au natural" antlers are amazing, I prefer brighter look.

Obviously, you can get fake antlers that will stay bright forever. Which is a nicer/more humane solution. That being said, for all of those who are sporting the real deal in your home, this super simple trick is for you.


Supplies:
An antler of your choice
Bleach
Water
A bowl or Sink


Pour equal parts of water and bleach into a sink or bowl.  I used a bowl because I didn't have a lot of bleach left.  I go through that stuff hard core.


Place the antler in the bowl.  If the antler isn't fully immersed, that is completely fine.  Just know that you will have to rotate it.  I waited about 30 minutes for each end.  The time also depends on how dirty (it takes off everything!) your antler is. I have already bleached this particular antler about 3 years ago, so it was more yellow than legit dirty.  


 Let it dry thoroughly. 


Bam! You are done. Style it! How easy, but oh so satisfying is this?! Wait, I'll do one more.


Ohh yeahhh! I didn't photoshop the image above, just so you can really see the difference.  


Part of me wonders if this is something that hunters/taxidermists have known forever?  I mean I am none of the above, so I could've easily missed this boat on this.  Whatever the case, it does the job! 


Monday, August 25, 2014

Vintage Rattan Chairs


My relationship with Craigslist is casual.  In the sense that I love Craig, but I don't commit to him in the way that he needs and deserves.  So when I saw these rattan chairs late one night, it was hard to sleep.  I mean, I contemplated texting the seller at 2 am because I couldn't stand not knowing if they were sold.  Now I know what Beyonce means when she sings "Crazy in Love".

Because I am feeling so crazy in love with these chairs.  Did I mention they are in almost mint condition? And that the seller went down from $90 to $75 for the pair?! In other words, I feel unworthy of the awesome that these guys bring to our living room.


I have been really struggling with pulling the trigger on a pair of chairs.  Like over a year.  I mean, chairs are hard.  New ones are incredibly expensive and vintage ones just involve a lot of footwork.   I needed something airy and light, with minimum upholstery because our living room/dining room/kitchen is an open floor plan. So these fit the bill in the best way.  They make the space look curated and interesting without feeling overly heavy.  They are also so comfortable. I know, right?!

Now all they need are super amazing pillows and another sheepskin.  Which leads me to make a mental note that when Ikea KC opens I should buy at the very least, 17-36 sheepskins. You never know, ya know?

I also vow to recommit to Craig.  I feel like this is his way of saying that I need to stop flirting with him and check in on a regular basis.


Friday, August 22, 2014

Summer Green

I've talked about my parent's small farm before and how it is little slice of paradise.  Right now it's especially beautiful. It's as alive as it will ever be before the dog days of summer come and gobble up all of the green.  This year we've eaten raspberries, grapes, strawberries, and blackberries that my mom has picked.  She actually came over one morning and I woke up to find her baking a blackberry cobbler. I MEAN WHO DOES THAT?! SHE IS THE BEST.

They recently added chickens and ducks to the mix, and they are ridiculious.  The ducks refuse to go towards the water and they just want to hang out with the chickens at all times.  They were raised together, so I am guessing they think they are said chickens.

Another thing I love about the farm is my mom's oriental wisteria.  She has had it for around 8 years and it had yet to bloom. Two years ago, she was about to cut it down when it burst into these brilliant flowers. I think she said they only lasted for a couple of days, but the blooms were so beautiful that she said it was worth the 8 years of waiting.  I just love that story.  Some things take a long time, but are so worth it.

I guess I could apply that story to the sun hat that I am wearing as well? I bought it a year ago and lost it.  I looked high and low for it, finally thinking it was gone forever. Then while we were cleaning out our garage, I opened up a trunk and there she be! Not quite the same as waiting 8 years, but you get what I am putting down?

Wishing you guys a wonderful weekend! One that is full of ducks, blackberries, and small slices of paradise.

Wednesday, August 20, 2014

Master Bathroom : The Design


The master bathroom has been moving along at a nice pace! She's got a fresh coat of paint (Pale Bloom by Valspar) and let me just tell you it is already so much nicer getting ready in a brighter environment.  I still love super dark and moody bathrooms, but not so much when I am getting ready in it daily.

I put together a design board to pull everything together to make sure it all vibes well, and I am loving it!  So far we are waiting on the mirrors to arrive and are sourcing out wood for a super fun accent wall.  I decided on the brushed nickel faucet pictured above because we already have brass happening downstairs and I wanted it to feel a little different while still remaining cohesive with the rest of our house.  However, brass is my jam and it has a tendency to sneak into everything I do.  Plus I've never said no to mixing up some metallics.

So basically what I am saying is that I will use brass somewhere. Sorry Evan.

I am still in debate on painting our ceiling black. I love the idea and look, but our ceilings are textured and the bathroom isn't large. It could be really amazing or really terrible.  What do you guys think? I would love to hear!

Monday, August 18, 2014

Greetings Planter DIY


First off, you know I love a good planter...

When we bought our house, the front porch was completely closed in and guests entered from the side.  Which makes one question "What's up with that?"  It just didn't function the way we wanted it to.  Since moving in, we've opened up the front porch and just recently moved our mailbox from the side to the front.  So much better! However, the side entrance was starting to feel a little naked.

Enter this Greetings Planter!

The house number planters that you see all over the internet are totally my jam. But we really didn't need house numbers on the side of our house, and although they are super beautiful, they are super pricy.  Since this isn't our main entrance, I wanted something simple and inexpensive.


Supplies
-2 pieces (1/8 in x 4 x 12) of birch plywood
-1 piece of 3/8 x 12 x 12in birch plywood
-Wood letters
-Succulents or cacti
-Plastic container to plant succulents in
-X-acto knife or dremel
-Ruler
-Sandpaper
-Wood glue
-Wood fill
-Spray paint
-Weather protecting varnish
- Hooks to hang planter
 *All can be found at Michaels or your local hardware store


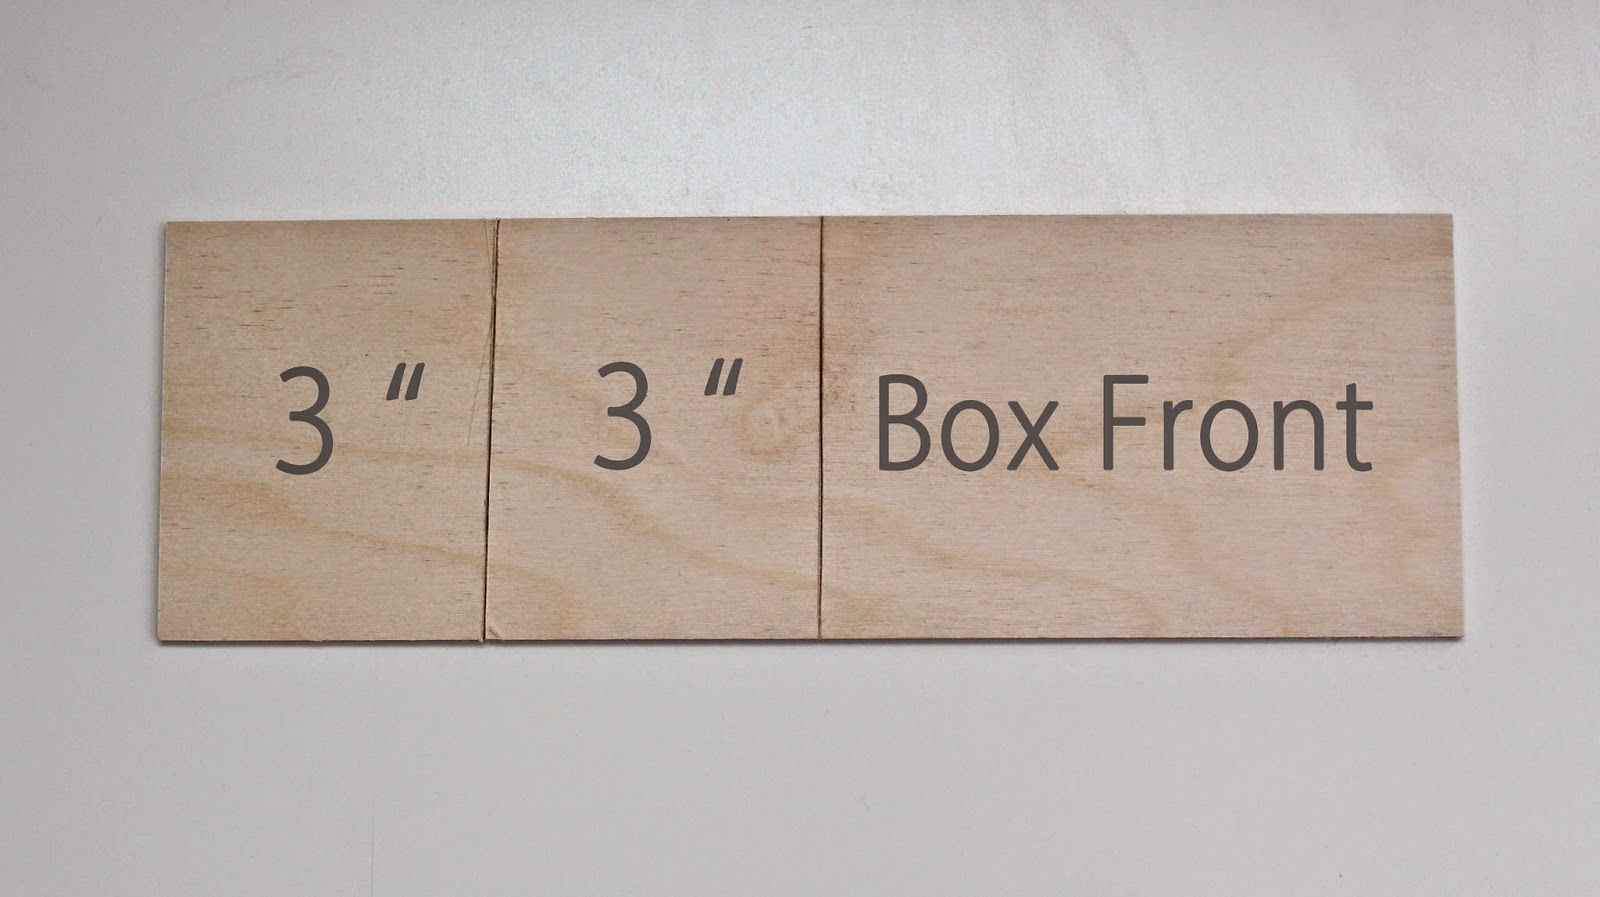
Measure two 3" pieces for the sides of the box. Mark and then score with your knife. I found that you could score the wood about halfway and apply pressure to break it in half.  The excess will be the front of your planter box.  Make sure and label your pieces, just in case!


Here's the lazy way to figure this out- take your front piece and butt it up next to the piece of plywood. Then mark that bad boy. This will be the bottom of your planter.


Sand all pieces including your bigger piece of plywood.  Sometimes during the cutting process, your measurements get a little skewed. Sanding helps even things out and get a better finish when spray painting.


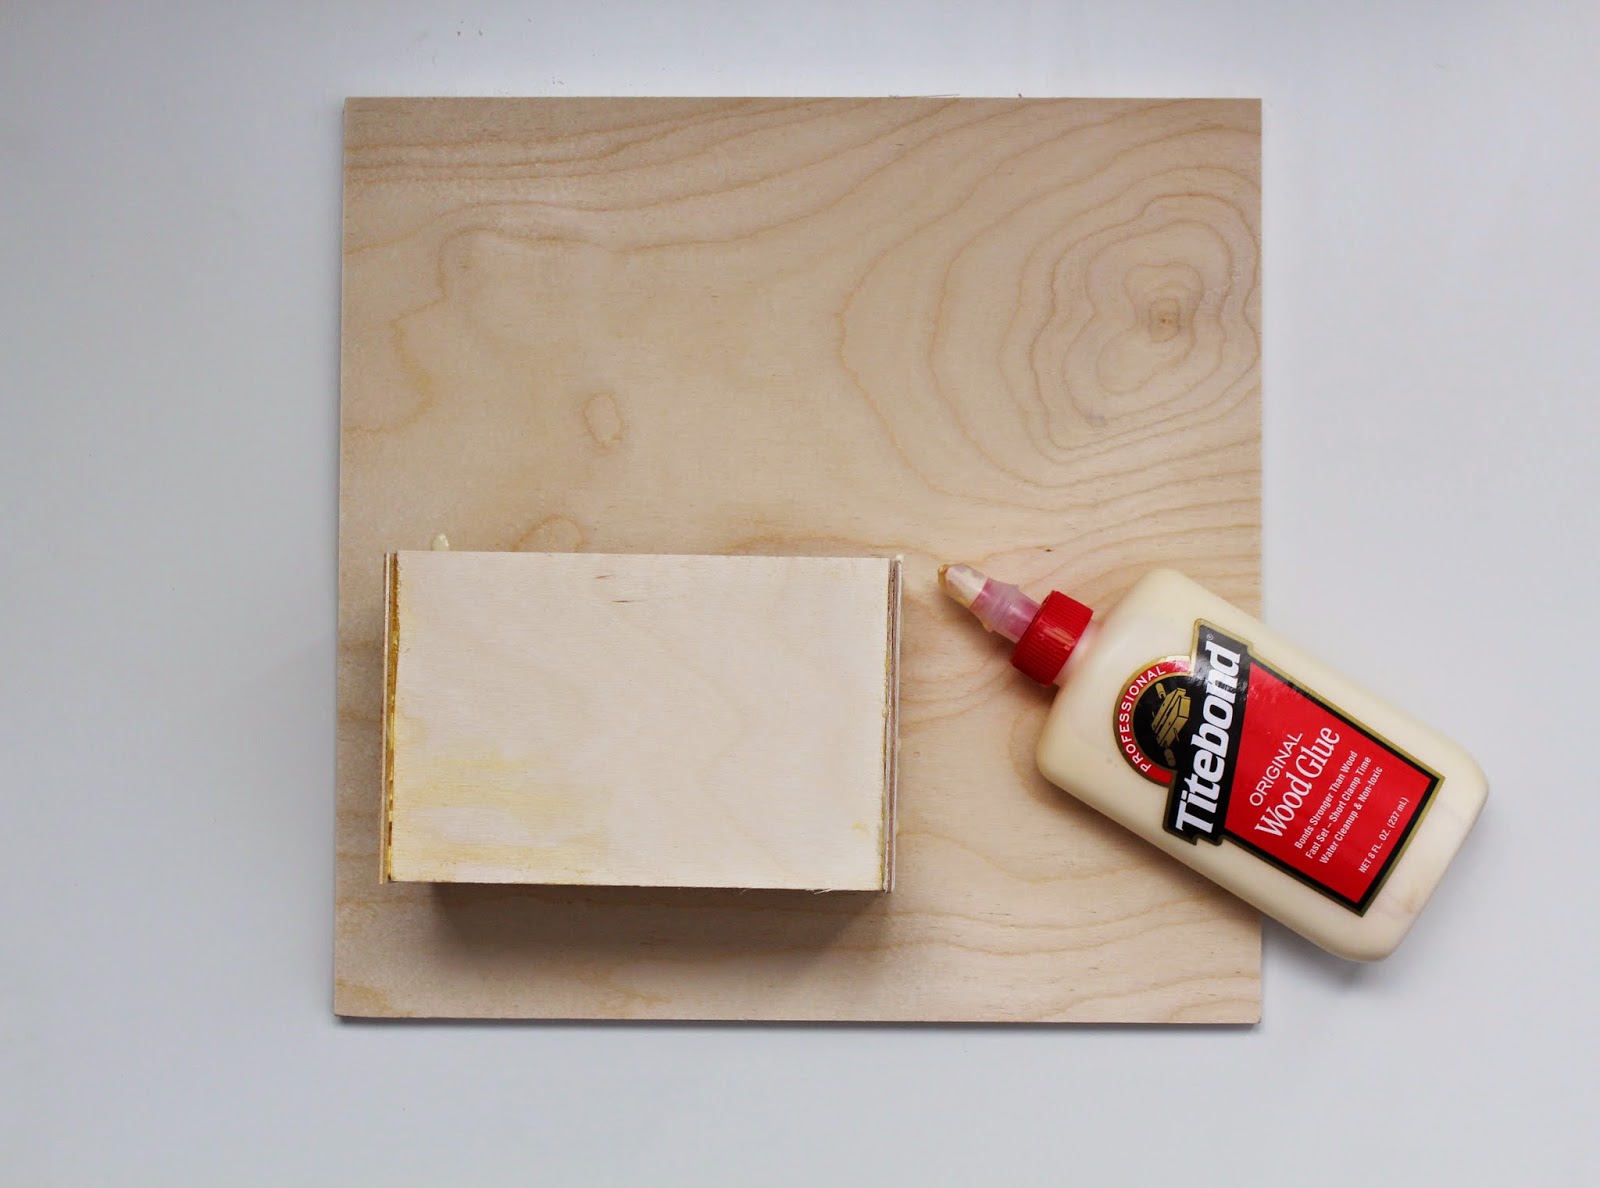
Use the wood glue to adhere the pieces together.  Rest the pieces next to a box so the pieces dry straighter.  Wait about an hour in between pieces.  When I glued my sides, I rested a heavy book on top of them to help with pressure.


After the box is dry, cut the excess off of the back using your x acto.  I didn't do this step in the beginning because I wanted to make sure all the edges would meet up.  If you are super precise, then you can totally do this step when you are cutting your pieces.  If not, it isn't hard to just cut and sand the existing part off! #winning


Glue your box to the plywood. Place a heavy book to apply pressure while drying.  I would wait overnight, just to make sure it's really solid.  After drying, apply wood fill to all of the cracks and crevices. Once the wood fill is dry you can sand it off to make it look smooth.

* If you get thicker plywood, you can nail your pieces together after they are all dry. I did this with the first planter box I made, and it worked great! It's just an extra step, and it's harder to cut the thicker plywood with a knife. Plus the plants aren't super heavy, so I decided to skip that step for the tutorial.


Spray your planter and letters! After spray painting, I lightly sanded the planter because I didn't want it to appear overly glossy. Glue your letters down.  This is where you can really add personality to the project! I really thought about adding "Wazzzz up" because I feel like that should've never went away.  But ultimately, Bonjour won.

After the letters are dry apply your varnish. I skipped this last step because I have a covered entryway.  However, I am going to go back and apply it because weather is crazy here in Missouri!


Add your hooks to the back and then plant your succulents.  I used a tupperware container (that I found at Michaels in the dollar section) to plant my succulents. That allows you to just pull them out of the planter when you water them.

Hang that bad boy. Then do a jig because this thing is awesome and so are you!

This is such an easy and cheap project to do that adds so much fun to your entryway. Overall the materials cost me around $30!


I am already thinking about all the fun things I can add to it when the season changes! Mini Mums?! Holly?! The opportunities are knocking at my door...Sorry. That joke just needed to happen.

Happy planting!