|||BE HOME SOON|||

Pages

Wednesday, February 26, 2014

Lyndi's Bridal Shower-Part II The Decor


So I am going to be honest about the fact that I was really sad to take down all the decor at the end of the night.  I just wanted to eat breakfast for a week at these tables.  You know, start your day out with an awesome party.  

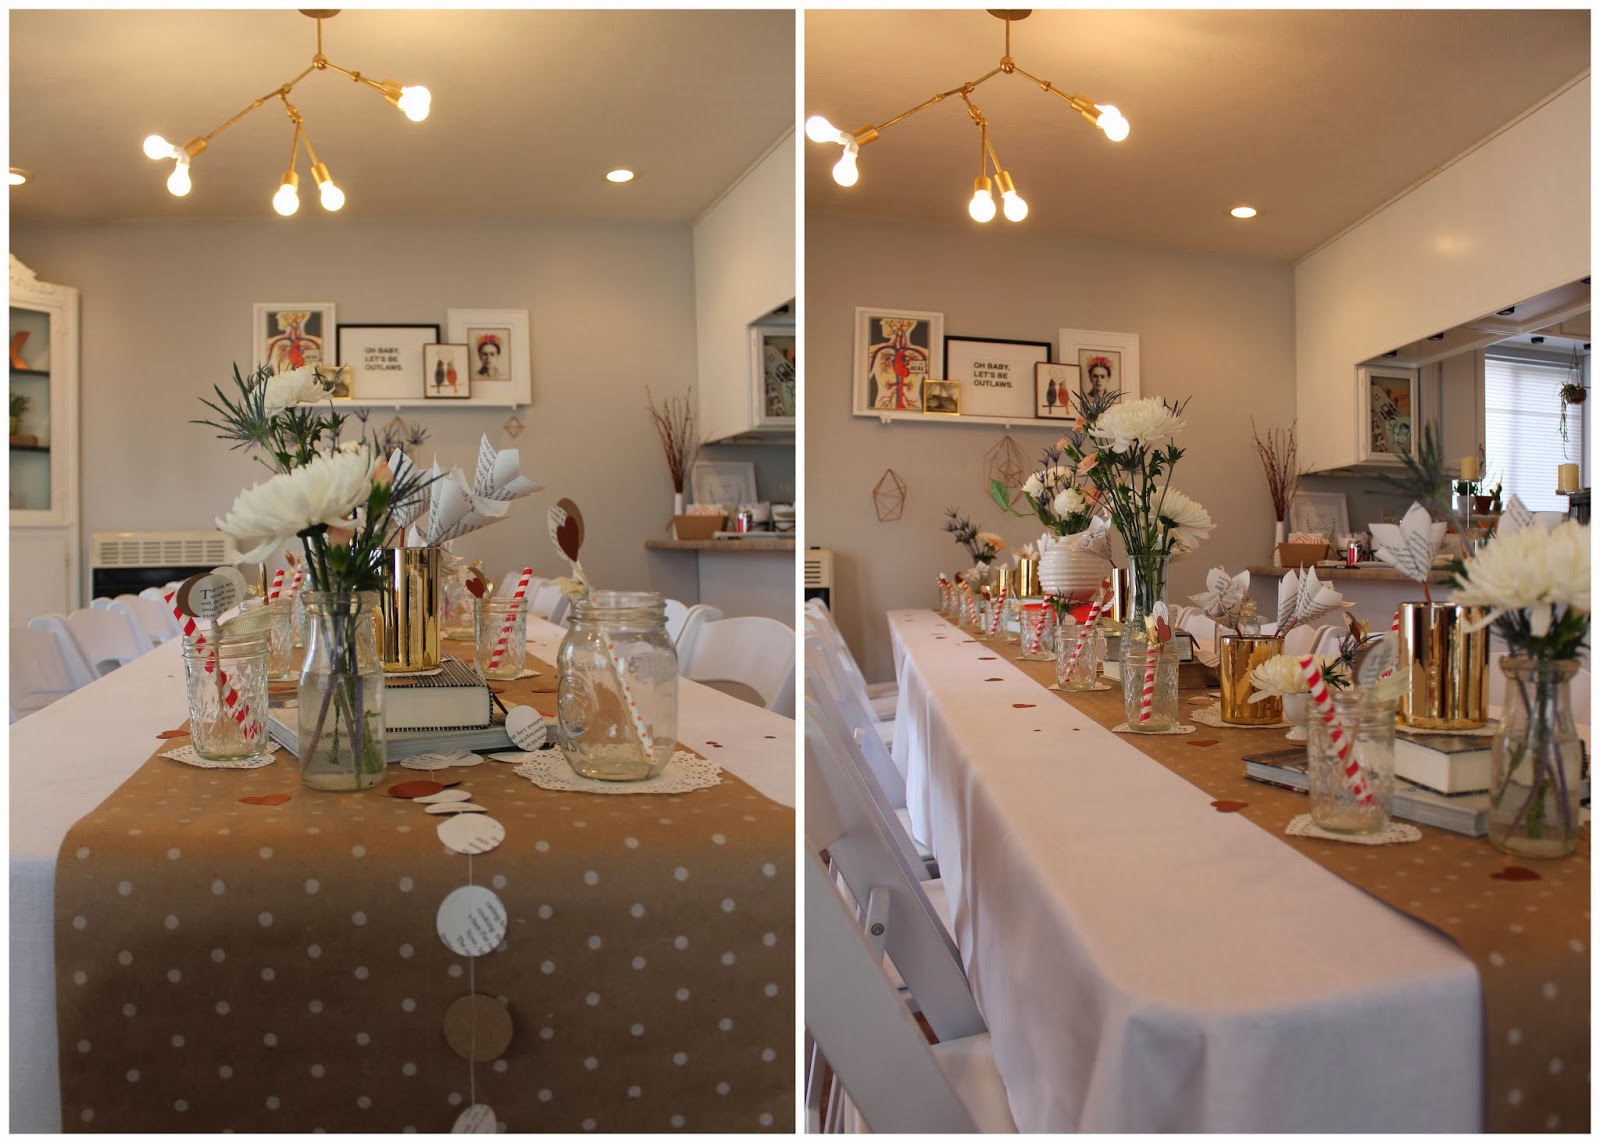
As I had mentioned before the bridal shower was book & flower themed.  We also threw in gold, copper, and silver accents just to jazz it up even more.  For the tables, we just placed two long ones together to create "cafeteria style" seating.  I really liked how this turned out because it allowed for everyone to get to know eachother if they didn't already. I had already made those oragami flowers weeks prior (time consuming, but so awesome) and we layered those, real flowers, confetti, sewn book garland, books, and anything else that tickled our fancy on the tables.  I really like a collected feeling, so flowers were put in egg cups and vases of different sizes and color to make it interesting.  

For the dessert table, we actually moved my tv and placed a table over the media console! The wallpaper served as a great backdrop and we just added those book mobiles and book garland.

The flowers were probably my favorite part.  The purplish greenery was just so freaking cool.  Someone actually googled what it was and it is a member of the thistle family!  I'm sure all the farmers that read this blog (a lot, I'm sure) just fainted.  THISTLES!  We used them along with other greenery and carnations in the floral crowns, which were super easy to make and so pretty.  Also shout out to my mom, who stayed two nights in a row to help me and Morganne.  She is like the party queen.  Her nickname is Hott Donna, if that tells you anything.

It was such a fun and beautiful day full of laughter and good food. And most importantly a day dedicated to celebrating our girl's new chapter in her life. Congrats Lyndi!

Monday, February 24, 2014

Lyndi's Bridal Shower- Part I the Party


This weekend was one for the books. Literally! My friend Morganne and I threw a book/flower themed  bridal shower for our best friend Lyndi on Saturday.  This girl reads about three books a week, so it was a given that they would be the theme.  She is also a girly girl to the core and what is more girly than floral crowns?  The answer is nothing.  Floral crowns are the trump card of girly. One of the many reasons I love Lyndi is because she lets me boss her around while I take pictures and that results in a lot of fun shots.  It also doesn't hurt that she is drop dead gorgeous and wears pink tulle skirts.  I mean, can we talk about that pink tulle skirt?!

I'll be back with another post this week about the decor! 

Also a huge thanks to all the awesome gals that showed up to honor our girl. You mean the world to us/her and dang you guys looked good in those crowns! 


Monday, February 17, 2014


One thing that I love about our house is all the light.  It's not direct light thanks to our porch so things don't get too overwhelming and bright.  As soon as I wake up I throw open all the curtains and let it stream in. Then I dance through the house with my arms open and sing a morning song.  It's really dramatic.  If we didn't live right in the middle of the city I would skip window treatments all together, but I'd rather not meet a peeping tom.  

This weekend was spent making tons of decorations for my best friend's bridal shower that is happening this weekend.  Evan had his first show in Canada and I went shopping with my sister, brother in law and Noa.  Her smile just melts you. I also ate heart shaped pizza and watched a movie with my aunt and little cousins on Valentine's Day.  She decorated the table and had Valentines in everyone's place.  My mom and aunt have been doing this kind of stuff forever.  They are ridiculously creative.  It pours out of them and they can't stop, won't stop.  (that was for you Evan)

Hope everyone has a great Monday!    


Monday, February 10, 2014

How to Make an Air Dry Tray


Trays are my all time favorite thing.  They "ground" your space, corral odds and ends, plus they look good.  I was needing a fat, square tray for my nightstand and wasn't having very much luck finding one that wasn't crazy expensive.  Enter air dry clay. 


What you'll need: Air Dry Clay, paint brush, something to stamp with (like a vase or a lid) liquid gold leaf (or regular), a rolling pin, straight edge, parchment paper, and a butter knife.


1. Roll out your clay to roughly the size you want your tray to be.  
2. After that use your straight edge to measure out your size.  I used a scale, which is like a 3D ruler with different dimensions on it.  You can use a flat ruler.  Cut along the side of your straight edge.  You will want to square up your tray using the straight edge as well. 
 3. With the excess clay, cut your sides.  Determine your width first, which will be how high the sides are from the base.  I made mine 1/2" because I was just using this to corral bedside jewelry.
  4. After that stamp your tray with your object.  I used a small vase to create the circles.  Be sure to overlap your stamp because thats where you get a really cool effect with the paint!
 5. Take your sides and adhere them to your base with the butter knife.
  6. Cover base with parchment paper and sit something with weight on it.  The clay has a tendency to fold up while it's drying, so the weight helps!  
7. After the tray is dry, paint the center of your pattern.  I used Martha Stewart liquid leaf in copper, brass and gold to create the effect I wanted.

** You can omit step 5 and just lay your sides down alongside the base.  Cover all of the clay with parchment paper and then place a book over it.  Flip it several times and then glue the sides to the base with hot glue.  


Look at it working its magic, holding things like a boss.  It's light weight and the perfect size for my nightstand. 


I love how organic it looks and feels.   The drying process slightly twists the edges and makes them ripple.  If you are a perfectionist, run away from this project!  

Also- Thank you to my best friend Lyndi, who doesn't question me when I tell her to come over because I need to take pictures of her hands. 


Tuesday, February 4, 2014

Before & After Wallpaper


Ahh. I love to check things off my list.  Especially when that list has been collecting dust for 3 years because I can't officially commit to a wallpaper.  Well not anymore!


 Ever since we moved into this house I knew I was going to wallpaper this little half wall that our tv is against.  It is weird and angular so a gallery wall wouldn't work. Our kitchen/living room/ dining room is completely open, so it is a big statement wall that was just left completely naked. Naked and afraid.

I had sourced out other wallpapers like thisthis, and this but they were either overdone or didn't work in the space.  Then I found the Half Moon Wallpaper from Ferm Living and it was love at first sight.  It is graphic and bold, the pattern is weird and awesome, and there isn't a huge commitment to color so I won't hate it anytime soon. In other words it's my jam.


My mom and I (she is the best) put it up on Sunday and I love it so hard. Overall it was time consuming, but not hard to hang.  We had to sand the texture off of the wall (I wish we would've had them skim coated before we moved in) to ensure that there wouldn't be bumps in the pattern.  The only thing that freaked me out was the black moons smudge, but you can wipe off the excess with a hot damp cloth and you are good to go.


I am going to take the Foo Fighters broken guitar off the stairs and move it somewhere else.  I am stumped about the stairs.  I am almost positive I want to leave them blank because the wallpaper breaks up the space nicely and it could get cluttered. What do you think?

Also how many of you have to heavily filter the amount of guitars/music memorabilia that drifts from your loved ones music room? Tis an everyday battle here.